The Vox article that I was interviewed for is up and running, and it contains some serious fuckign information about this whole fiasco.
Information that tumblr just straight up refused to provide to its userbase at all.
Unsurprisingly to those of us watching this website deteriorate over the last year, this full content purge and ban has been in progress for a solid 6 months. The date got moved up because of the child porn thing, but it was always coming for us.
Equally unsurprising: Tumblr’s management and ownership are absolutely destroying the actual staff working on it. The company has been hemoragghing senior staff without so much as a token attempt to keep them in place. So the drops in site quality are real, and wil probably only be getting worse.
Truly astonishing is the fact that apparently this crap was supposed to “double” the userbase by the end of next year. Boy, howdy, that’s not gonna work out well for them.
Read it. Know what’s happening. Know why it is happening.
Category: Uncategorized
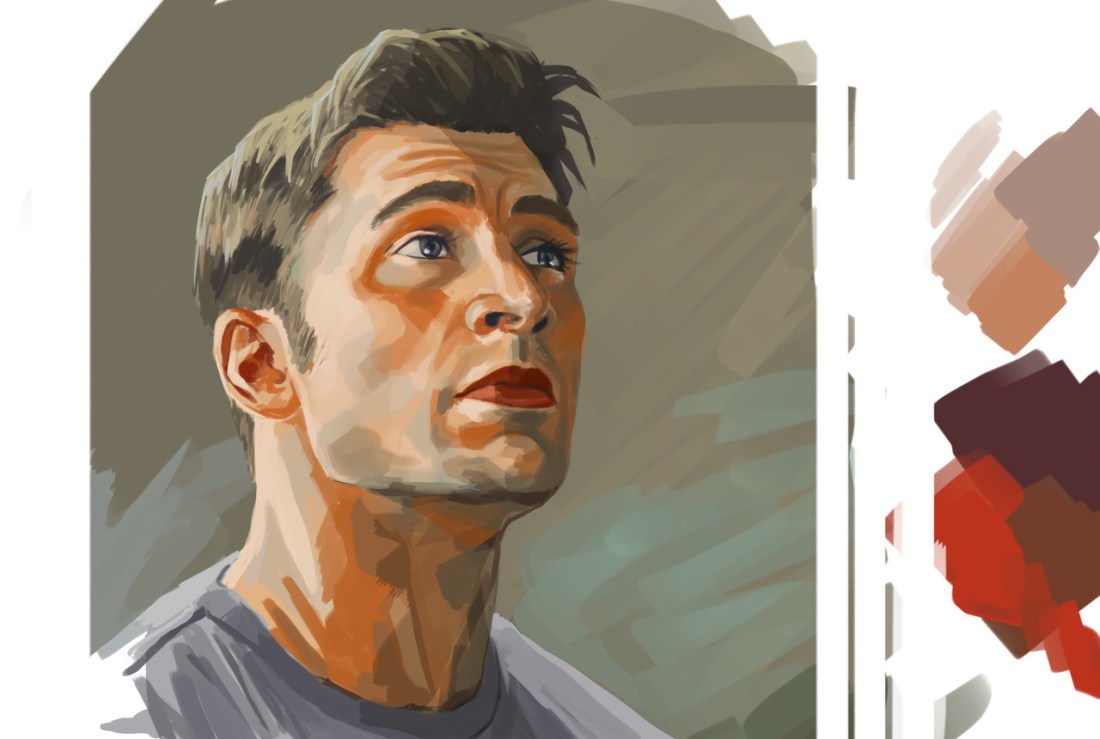
id like to thank the venom fandom, the true last bastion of nsfw fanart on this hellsite. ive been here for like seven years and its just so fitting that the last explosion of horny art, the last gasp if you will, was lovingly rendered monsterfucking slime tenderly jacking off its host, tom hardy


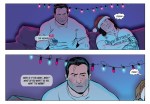

Hells Kitchen Movie Club Xmas Special! Ho ho ho, motherfuckers! Love from me, @dave-acosta and @deecunniffe
Bucky’s shirt a low-key nod to @buckykingofmemes, who we adore
Previously in Hell: cover image // 01 // 02 // 03 // Xmas // 04 // 05 // 06 // That time the Punisher’s creator gave us a thumbs-up // twitter // insta
HOW did I get a shoutout in this A YEAR AGO and never knew about it?? This series is excellent! Look at that drowsy Bucky!


Hey guys. I’m glad to be finally posting my “mental breakdown survival guide”. As you know I struggle a lot with mental health, and so I have been through a lot of breakdowns. So many that I actually dropped out of university after 3 weeks in 2016 and had to take the whole year off. Because of this, I’ve made it my mission to help others with mental health issues as much as I can, so you don’t have to go through what I’ve been through.
Anyway, here is my guide. I tried to keep it general, and actually useful. If you have any questions or additions please feel free to add them.
And as ever, if you want to talk to me about studying with mental illness or want to see a post on a specific topic, please feel free to message me.

Note to self
Stop thinking: “I’m not talented enough to execute this concept.”
Start thinking: “I’m going to be a stronger artist when I’ve finished this piece.”This is a fixed mindset vs. a growth mindset.
Your abilities are not static, and any challenges you have, anything that turns out different from how you imagined, is not evidence of failure, just a struggle towards improvement.
heads up to my underage followers
don’t join mastodon. the lax nature of regulations makes it an extremely popular platform for maps and pedophiles.
there are always alternatives to tumblr but mastodon is Not a trustworthy or good one
This is based on a drastic misunderstanding of what Mastodon is. It’s not a social media site like tumblr – it’s open-source code that allows anyone to create a social media site, which can then interact with other sites using that code. To say Mastodon has “lax regulations” is really misleading, because Mastodon itself has no regulations, it only has tools for moderators to regulate their own instances
Mastodon “allows” pedophiles in the same way that email “allows” identity theft scams. No, “email” doesn’t put a stop to identity theft, but “email” is just a set of protocols for sending messages – it’d be absurd to expect it to
Most Mastodon instances (including mastodon.social, the largest and oldest) do more to keep pedophiles off their platform than tumblr ever has, by having strict rules against it, banning any instances that don’t have strict rules against it, and actively moderating to enforce those rules. At that point it’s as if the pedophiles are on a different website entirely – because they literally are on a different domain
As someone who actually uses it, I can confirm that I’ve never had or even heard of a run-in with pedophiles. Admins know the instances that allow it and quickly block and spread the word about any new ones that pop up. Again, it’s been more of an issue for me on tumblr than it’s ever been on masto
Please reblog this. People love spreading this rumor without knowing what they’re talking about, and it’s driving people away from non-corporate, community-controlled, secure open-source social media. And that’s a real big shame


1] A grip is considered forward when the blade opposes the little finger. The Hammer grip, also called forward, this is the predominant grip technique. The fingers are wrapped around and under the belly of the handle, and the thumb is wrapped around the handle and in contact with the forefinger. The knife assumes a blade point angled up position when the wrist is locked and square.
The traditional grip technique’s main advantage is reach and some say finesse. The knife blade is held away from the body, and with an extended arm can deliver slashing cuts at the greatest distance. Because it is traditional, it feels the most comfortable to most people. It is the way most knife and other tool handles are oriented, and lends itself best to cutting and sawing chores in front of the knife owner. Because of the location, the knife and its work (or enemy) are easy to see. Notice that the knife is always at an up point angle, because of the natural orientation of the wrist.
The disadvantages are that the knife is far away from the body, therefore the hand is vulnerable and easily trapped or injured by an opponent or enemy. Also, less force can be applied the farther the hand is from the body and the more the arm is extended. The wrist must usually be canted (tilted) forward for the blade to remain straight or horizontal and aimed at the enemy. This can be unnatural and hard on the joints at the wrist, preventing the knife user from locking his wrists such as in a square-fisted punch. Enemies behind and beside may be hard to reach with the blade. Locking the wrist square in a punching position directs the knife point straight up or toward the user, not the opponent, particularly since the elbow folds inward, and can bringing the knife point directly into the knife user’s head and chest area.
2] A grip is considered forward when the blade opposes the little finger. Another variation of the traditional forward grip technique is the Saber; to have the thumb on top of the spine of the knife, or at the quillon or thumb rise. The saber grip will allow the hand to apply pressure with the thumb, which is very strong in the human hand.. In cutting chores, rather than tactical or combat use, this position allows good control and reach. In tactical use, it has similar advantages as the hammer (above).
The obvious disadvantage of this gripping technique is that the hand has a noticeable opening between the thumb and the forefinger and middle finger, so the grip is not as certain and secure as it would be if the hand was completely closed. It can help somewhat if the handle shape has substantial front and rear quillions to help secure the hand in the knife handle.
3] A grip is considered forward when the blade opposes the little finger. The modified saber grip technique is the same as a hammer grip, but in the modified saber grip, the thumb is placed on the side of the blade. The advantage here is the same as the hammer, in that the grip is very strong, and it is stronger than the traditional saber grip technique as more of the hand (the thumb) is actually wrapped around the knife generally. The modified saber grip also forces the hand to naturally orient the knife in a horizontal or slashing position if the hand is held in traditional square-fist orientation: the strongest, locked wrist punching position of martial arts.
The disadvantages to this technique of knife grip tactic are several. The thumb is positioned on the side of the blade, precariously near the cutting edges. A few jostles of the hand and the thumb could slide down to the cutting edge ( or serrations in other models) and be badly injured by the user’s own knife. Another disadvantage is that cutting outward can not happen in this grip technique unless the knife is double edged, and even then, the musculature of the human arm has limited strength in a backhand motion unless the knife user is a well-trained tennis player!
4] A grip is considered forward when the blade opposes the little finger. The Filipino grip is a forward grip technique where the thumb is not wrapped around the knife handle, like the hammer grip or along the back of the handle like the saber grip or along the side of the blade like the modified saber grip, but along the spine of the knife back. The idea is that the thumb guides, aims, and applies pressure to the spine of the knife, thus is able to increase pressure at the point of the knife blade. In effect, the blade can serve as an extension of the thumb, and for some it seems more natural.
The problems are several with this type of grip technique. First, it is probably better served on a small knife where the thumb extension feeling and association is more compact and reasonable. On a smaller knife, it can be a more comfortable and secure grip technique, but on a larger, heavier, and longer-bladed combat tactical knife, the thumb on spine is unwieldy and even uncomfortable. This is because it is unnatural for the thumb to be hyper-extended in a thumbs-up position, and the extension can mean that the thumb itself and its musculature and tendons are not protected and are subject to injury. Imagine a heavy strike applied to the main cutting edge of the knife in the photo. The thumb would be forced back toward the wrist, straining it, let alone my knife having a guard leaving a strain on my thumb. There is a reason that most martial arts systems teach a locked-wrist technique of impacts, and that is to protect this complicated wrist-hand-thumb joint. The second issue is that with the thumb extended, the motion of the forearm is more restricted. If you don’t believe this try this simple exercise: with your hand closed in a fist, extend and rotate your right hand counterclockwise, until your thumb is on the outside of your body axis. The rotation is unencumbered in most people, and the rotation can continue all the way to the shoulder. Now try the same movement with your thumb extended such as in this grip. You might be surprised to discover that your rotational movement is significantly restricted! The same limitations occur in an opposite rotation with the elbow being forced to fold against the body to achieve the same rotational degree. The fact holds that with the thumb extended, motion is restricted and the thumb is more vulnerable.
I’m not claiming that this grip technique does not have its place, on small knives in close quarters combat. But for larger knives, it’s probably not the best grip technique.
5] A grip is considered reversed when the blade opposes the thumb. The reverse grip then positions the blade pointing downward in the locked fist position. Edge out means the cutting edge of a single-edged knife is oriented away from the body. This is a traditional reverse grip, because the handle orientation of most knives can accommodate either the traditional forward grip or reverse grip with the palm of the hand in the same location on the handle, along the spine. So, of the reverse grip techniques, this is the most frequently accommodated and the most comfortable for most knife handles.
The advantages to the Reverse Edge Out grip technique are many. First, unless the elbow is extended and locked straight, the blade cutting edge always faces the enemy, no matter where the hand is located (unless it’s behind the knife user!). When the fist moves as in a cross punch, the blade and cutting edge can be raked across the enemy in a slashing motion. Second, like an ice pick, tremendous force can be brought to bear on the point, not only when oriented downward, but when an enemy is behind or beside. Third, the grip technique allows capping where the thumb (and thus force) is brought to bear on the butt of the knife handle. This also increases the security of the knife grip. A fourth advantage of this grip technique is that the knife can be oriented with cutting edge to enemy even when guarding with the forearm. A fifth advantage is that the “elbows bent” position that is usually assumed with this type of grip technique can be more powerful and defensive than an extended and reaching forearm, which is unprotected and may be easily trapped and fractured.
One of the disadvantages of this grip technique is limited reach. Because the point and edge can not be extended like a forward grip technique, the enemy must be handled at a closer range. A second issue is that deep thrusting moves can usually only be made downward or sideways, not frontally, unless the knife user is on top of her enemy. A third issue is one of trapping; that since the knife is closer to the body, the knife and arm can be pinned with a foot, object, or enemy’s hand. Of course, the object pinning the knife is subject to serious damage from the knife, and certainly a bare hand will not be able to maintain pinning without being cut.
6] A knife is considered held in reverse grip when the point opposes the thumb. This variation of the reverse grip technique is called Edge In, because the cutting edge faces the knife user. The individual knife handle shape is a huge factor in determining how a knife can be comfortably and securely held.
The advantages of this grip technique are similar to the advantages of the Reverse Grip Edge Out (RGEO) technique above, in that great force can be brought downward on the point of the knife blade. The movement is a clawing one, which some knife users are comfortable with. Enemies at the side and back can be vulnerable to this grip technique also.
The disadvantages are distinctly different. Having the cutting edge facing inward puts the movement of the knife blade toward the knife user. Cutting toward oneself with a 5” long bladed knife is never a good idea. The motion of thrusting is downward and inward, pulling the enemy closer into the knife user’s body. If the knife user is trapped or a strike lands on the knife, it can be injurious to the knife owner.
This technique and style is widely promoted with the claim that the it is the only Reverse Grip technique that can be damaging, as the knife edge can cut as it’s pulled in and down. This is only part of the picture. Knife slashes are less fatal than stabbing, piercing, or thrusting; the ancient Roman proved that.
7]The Forward Grip Edge Up technique has the knife handle spine cradled in the fingers, with the thumb either on the quillon or wrapped around the knife handle. A hunter may often use this grip when skinning hanging game and cutting upward.
This grip technique has its advantage in upward thrusts. Cutting upward is the main reason for this technique, and typically, the handle shape of the knife plays a large role in whether this technique can be comfortably used.
A distinct disadvantage is that if the knife is struck or parried, the impact could drive the blade’s cutting edge into the face or neck of the knife user.
Tumblr: Teaching us how to properly hold a knife for the next time we have to stab someone.
This is so important.
more like tumblr providing artists with amazing references oh god bless you
Reblogging because I know I have a scene where my character gets stabbed in the sternum and I will need to revise it someday.
How do you make the flowers for the flower crown? like specifically what material is it? Its super cool and I want to make one I just don’t know what I need.
Hmm, I just reblogged it from another site, but I think I can help you in terms of what to buy and how to do it. If you click the link, it’ll take you to the complete photo post that shows you what you need. In any event, here’s the list:
- Nail polish
- Floral wire, a thin bendable wire is ideal. 26 Gauge is fine.
- Floral Tape
- Wire cutters/scissors
- a pencil or cylindrical object to wrap the petals around
- Ribbon (optional)
DIRECTIONS
- First, you’re gonna need to make the crown. You can do this by using the wire you already have or you can use an old headband or anything that you like that resembles a headpiece. Thicker wire is also fine for this step.
As you can see, OP twisted two pieces of wire together and left loops at the end (to attach the ribbon). Then they covered it in brown floral tape.
- The second step is to make the flowers. Using your pencil/cylindrical object, twist the wire around it to create a ‘petal’. Repeat this until you have at least a couple of petals. 3-6 is usually fine, it’s really your call.
- SLIGHTLY bend the petals back to create a natural looking petal.
- After you are satisfied with the shape of your petals, cut out your flower, leaving some wire left to attach it to your crown.
- Repeat the first few steps and make the rest of your flowers.
- Take one of your flowers and CAREFULLY apply nail polish to it, one petal at a time. Think of it like making bubbles. It may be easier to pour the nail polish in a flat plate and dip it, or dip the entire flower into the polish.
Repeat this for all your remaining flowers.
- Twist the two ends of your flowers together to form a ‘stem’.
- Wrap the stems with floral tape, preferably with the same color you used in the base of the crown.
Repeat this for all your remaining flowers.
- The third step will be attaching the flowers to your crown. You can do this a few ways. One way is to wrap the stems around the crown. Another way is to just wrap the stems with floral tape as you go along, like the OP did.
Do this until all your flowers have been attached to your crown.
- At this point, you can tie the ribbons to the loops like OP did, or decorate it any other way you like. 🙂
Enjoy your new floral crown!
TIPS
- You can purchase most of the items in Walmart, Michael’s or any craft or flower store. You can also order it online. 🙂
- REMEMBER, this tutorial is just a guide. If you don’t want to use brown floral tape or if you prefer using the green floral wire, don’t be afraid to change it up. You can use any color or material your heart desires.
This is the link to the DIY Floral Crown post.
Sorry for replying late. I hope this helps you with making your own crown. 🙂
holy shit this nail polish thing is so clever! 😯
Going to have to pin this later.


